SFX
I wanted to get the Sound Effects over and done with as they take the shortest amount of time to make.
To make the first sound effect I first needed to look up how to use Famitracker which at the time was the easiest looking application that can make Chiptune I can find. I found this basic tutorial very useful as it gave me the basic premise on how to use FamiTracker
So the first bit of SFX I made was the ‘Shooting Noise.’ For this I didn’t want to go for a heavy sounding gun effect but I instead wanted it to sound more light like the sound effects in Super Mario Bros.
This is the bullet sound effect I made in FamiTracker.
The next sound effect I made was an 8 – Bit explosion. I couldn’t really make this sound effect in FamiTracker. Instead I found a much easier place to make this type of sound effect. I made this in a website called Beepbox.
This website is used to make Chiptune Soundtrack that’s why you’ll find that whenever you make any piece of music in this website no matter what you do when you export it, it will always loop. This gave me problems because the explosion sound effect I made only lasts 2 seconds but because it constantly loops when I exported it, it ended up being three minutes long.
Voice Acting
Research
As I said before I wanted the story telling to be just like Stanley Parable where the narrator progresses the game. So naturally I wanted to watch the gameplay of Stanley Parable just to see how they execute this feat. I am not a voice actor nor have I ever focused on making audio so this will be a challenge for me. In the game the narrator shows his frustration to the player by changing the tone of his voice and the way he speaks. If I had a proper recording studio with a decent quality mic I could probably achieve this as long as I have time which I didn’t.
Voice I felt really comfortable voice acting because I had experience acting before for my GCSEs however, it has been a while since I did acting so I felt as though I wasn’t good enough when it came to voice acting. Another problem I had was the fact that I didn’t have access to a good quality mic, not only that but the only room that was available to us at the time wasn’t build for sound capture so the audio ended up becoming a bit echoey.
I needed to make some small adjustments to every piece of audio we record. The first thing we needed to edit was the volume.
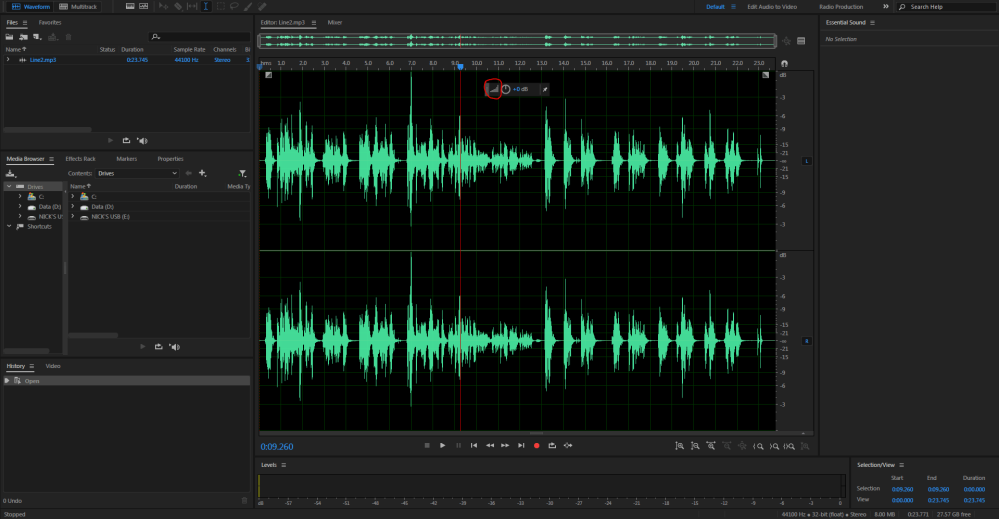
As you can see with in the image above there are bits in the sound wave that spike up. This is too loud. I have highlighted the volume slider on the image by hovering my mouse over it I can reduce the overall volume of the audio but if I wanted to I could highlight bits and pieces of the audio and then reduce the volume. This is what I did for most of the audio we captured but there are some that was loud overall and I needed to reduce the volume of the entire audio.
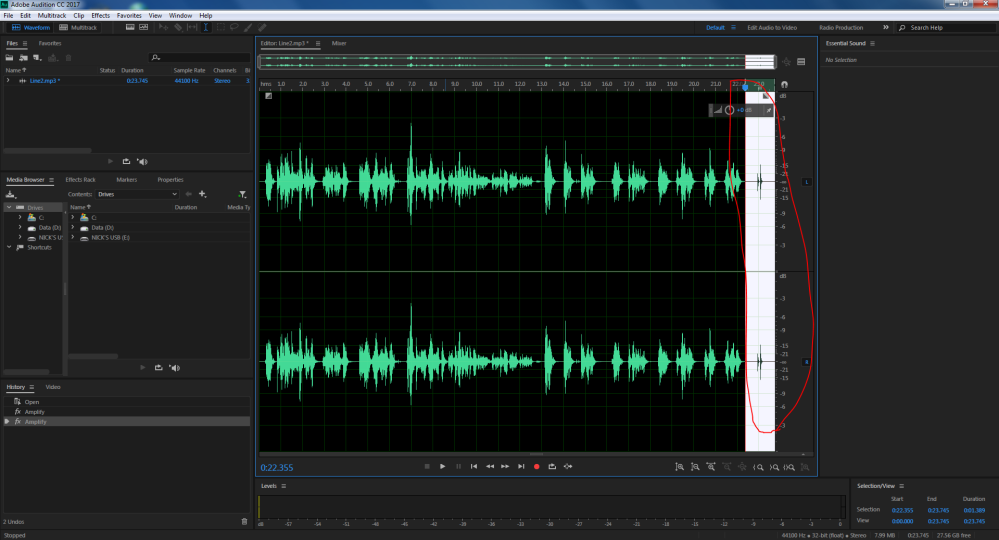
This is what it looks like when you highlight bits of the sound wave. This is simply done by clicking dragging. This is also useful for cutting pieces of the audio. I highlight then press the delete button and I did this because there were moments when there is silence and at the end of the recording you can hear the mouse click after I clicked the stop button to end the recording and obviously I needed to get rid of that. I also did this for the explosion sound effect I made prior to stop the constant looping.
When I exported the audio I needed to make sure that the audio was exported as a WAV and the bit rate was set to 16.
Adding Audio in my game.
At the start of this video you can see me adding the first bit of audio. By going on the level blueprint I dragged of event beginplay and disabled player input. This is s that the player doesn’t move while the audio is playing. I then play 2D sound and select the WAV file. Then I added a delay for about as long as the length and then I enable the input.
You can see that I also added audio for the crab. I went on the crab blueprint and attached a Play Sound before the flipbook animation. This is so that the audio plays after the bullet collides with the crab. I did the same thing with Owain character the only difference is that after destroying his actor I will open the next level.
Issues
Making audio was never my speciality. I was never good at using audio capturing softwares and audio editing softwares. I would have loved to learn more about Audition but as I mentioned in my ‘Planning & Weekly Diary’ blog I mentioned that the Unreal side of the project became corrupt and I had to restart my game from the start. This effected my schedule negatively as I needed to make time to recreate what I’ve lost so therefore I needed to cut down on the audio side of the project.

This was my schedule before the my game got corrupted.
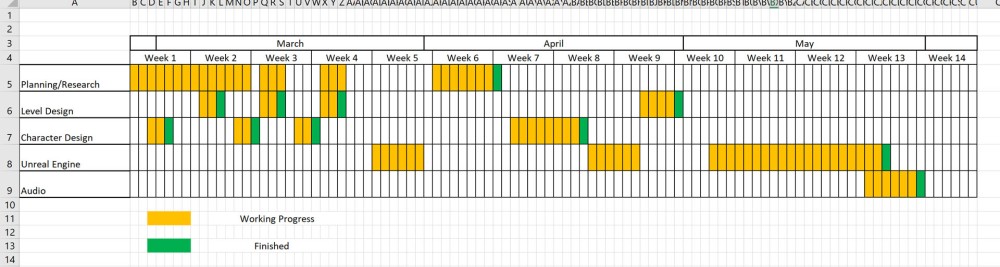
And this is the schedule after the game became corrupt. As you can see I drastically cut down on the audio.
