In this workshop we looked at another way of making metal objects look realistic. This time we looked a different finish for metals which is paint. When paint is applied to some metals, they sometimes peel because the metal hasn’t been roughened enough so that the paint could be absorbed. Knowing how to make peeling paint will add a layer of detail to any metal assets I make. With that said, in this workshop I learn how to do this by following the peeled paint tutorial in the allegorithmic website.
Opening sample project.
We started off by opening a sample project. Substance painter has a four sample projects that you can use to practice texturing. The sample we used was the preview sphere. We got rid of all of it’s applied layers so that we can start a fresh project.

To do this, we clicked on ‘files’ then ‘open sample’. From here you can select from one of four samples but the preview sphere was what we used since it was used in the tutorial.
This feature of substance painter will be convenient for me if I just want to experiment with textures quickly without the hassle of making assets laying out their UVs.
Making the Metal
We first made a base metal colour by making a fill layer and setting the roughness channel to 0.3 and the metalness channel all the up to 1. Then as the tutorial said we added a fill effect to the fill layer by right clicking the layer and clicking on ‘add fill’. On the fill effect, we turned off all unnecessary channels and kept the roughness channel. By left clicking the roughness channel, substance will give us the option to choose a grunge map but, since we’re following the tutorial we chose ‘grunge 007’. Your layers should look something like this:

and you’re texture should look something like this:
It’s worth noting that I forgot to rename the fill layer 1 to ‘base metal’. While I am aware that this is just a workshop, it is good practice to rename every layer to keep work organised and I will make sure to do this for other projects.
For the next step we change the channel mode of the layer from ‘base color’ to ‘roughness’, changed the blending mode of the fill effect to multiply and turned down the opacity to 25.

This is what we ended up with:
This part of the tutorial if I’m honest wasn’t really useful for me since none of these techniques are new to me since we learnt all this in another workshop.
Adding the paint colour and generator.
This is the part where we added the paint to the metal. We made a new fill layer and added changed the colour in the base colour channel, I made mine red. We also made the roughness 0.2.
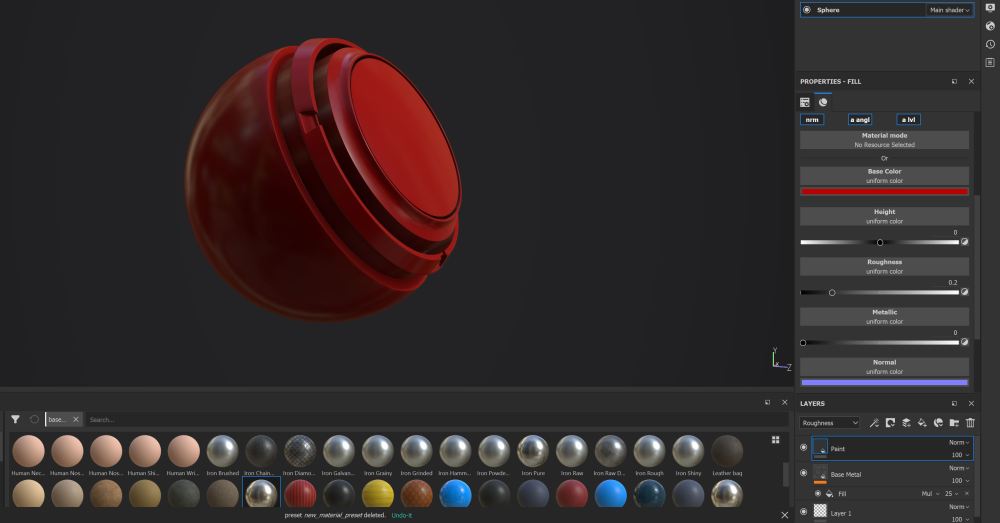
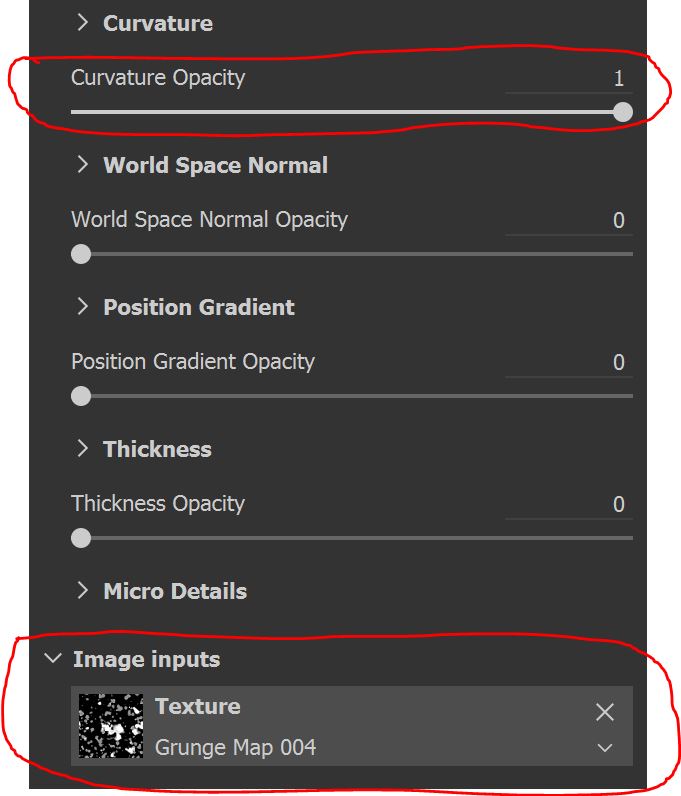
Next, we added a black mask to the paint colour layer and gave it generator. The generator we chose was a mask editor. It gave us the same effect as a metal edge ware but it gave us more options for customisation. We then scrolled down until we see ‘image input’ and clicked on ‘Texture’ which gave us the option to select a grunge map. We chose ‘grunge map 004’. We also turned up the ‘curvature opacity’ slider to 1 which turns up the overall opacity of the mask editor.
Next step, we scrolled up and opened up ‘Texture’ drop down menu, turned on ‘triplanar’ and turned up the ‘texture opacity’ slider to 1 so the grunge becomes more visible. Also, I didn’t need to do this for this tutorial but, I turned up the ‘Scale’ to 2.5
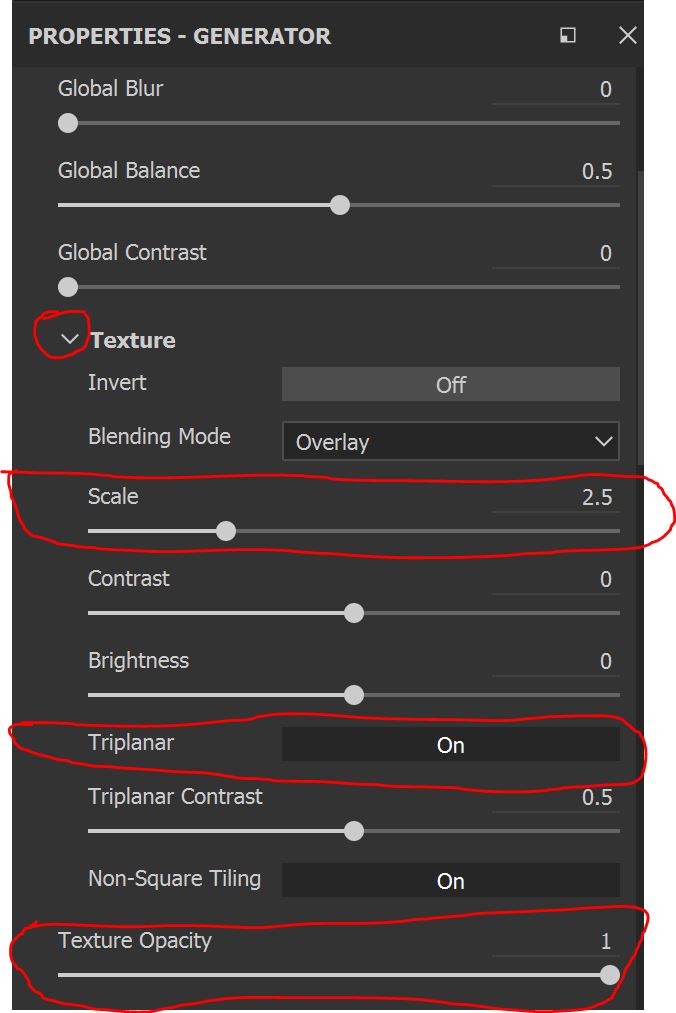
Lastly, for the mask editor section of the tutorial we needed to turn on the ‘global invert’. Had we kept this off, our texture would look like this:

But, we turned on the global invert and the texture turned into this:
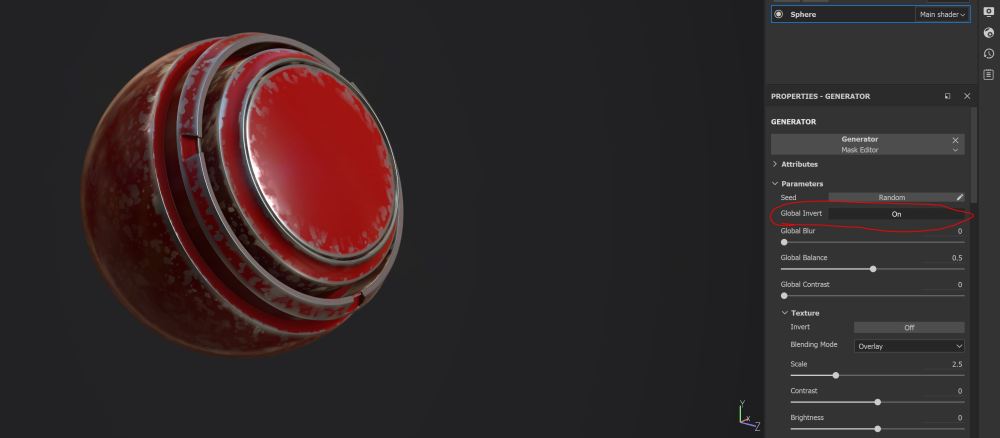
Global invert, inverts the black and white colours of the black mask. On the image above you can see that there is slider labelled ‘global balance’, which I turned down to 0.3 which resulted in the grunge map reducing it’s spread so that it is closer to the edge.
This is what it looks like:
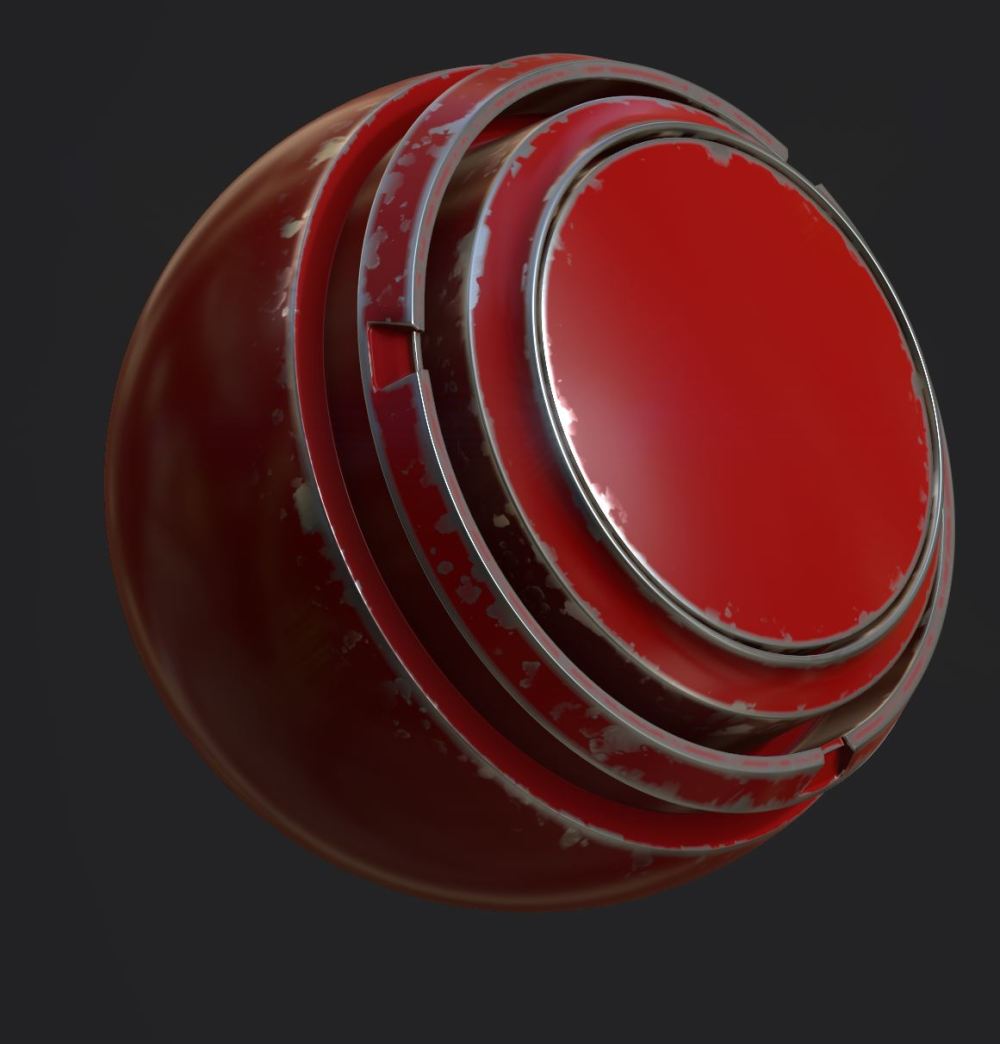
I like the fact that there are other options to choose from to get the metal edge ware effect. With mask editor, you have more control. sometimes with metal edge ware you don’t like the way it looks, with mask editor you can customise it to suit your needs.
Anchor Point
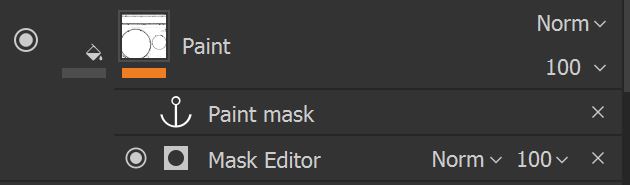
The next step, is to add an anchor point. This is done by right clicking the layer and clicking ‘Add anchor point’. We did this on the black mask of the paint colour layer making sure that the anchor point is situated on top of the mask editor generator.
This is what it should look like in the layers:
At this point, I have no idea what anchor points do.
The peeling effect
We created a new fill layer. I labelled in ‘peeling effect’ and enabled only the roughness and the height channel. The roughness was set to 0.8 and the height was then set to 0.2.
Then, we added a black mask and right clicked on it to add a fill effect. This fill effect will utilise the anchor point we made on the paint colour layer. To do this I clicked on grayscale button on the fill effect and clicked anchor which enabled it.
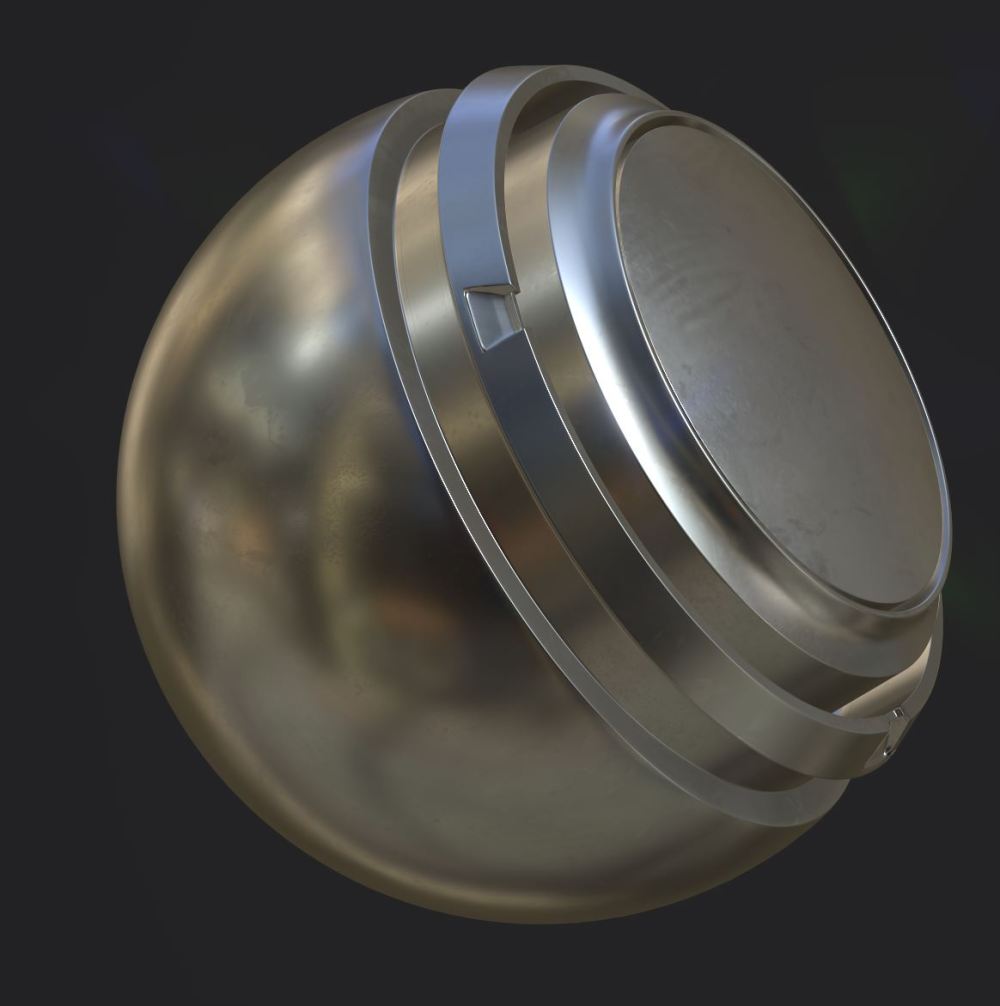
This step changed the texture to this:
The anchor was used as a reference for the fill effect and applied the height and roughness value to the paint giving it chipped paint look. This is my vague understanding of the anchor point and to be honest, I don’t see myself using it for the fact that I don’t know what it’s used for. It seems like a very useful tool that could make my life a lot easier so I will ask my tutor about what it does for the future as I don’t really understand the description the allegorithmic website gave us.
We are getting closer to get that peeled look. Third to last thing we did was add a blur filter to this layer by right clicking the black mask and clicking on ‘Add filter’ and selecting blur for the filter. We then set the blur slider to 1.5.
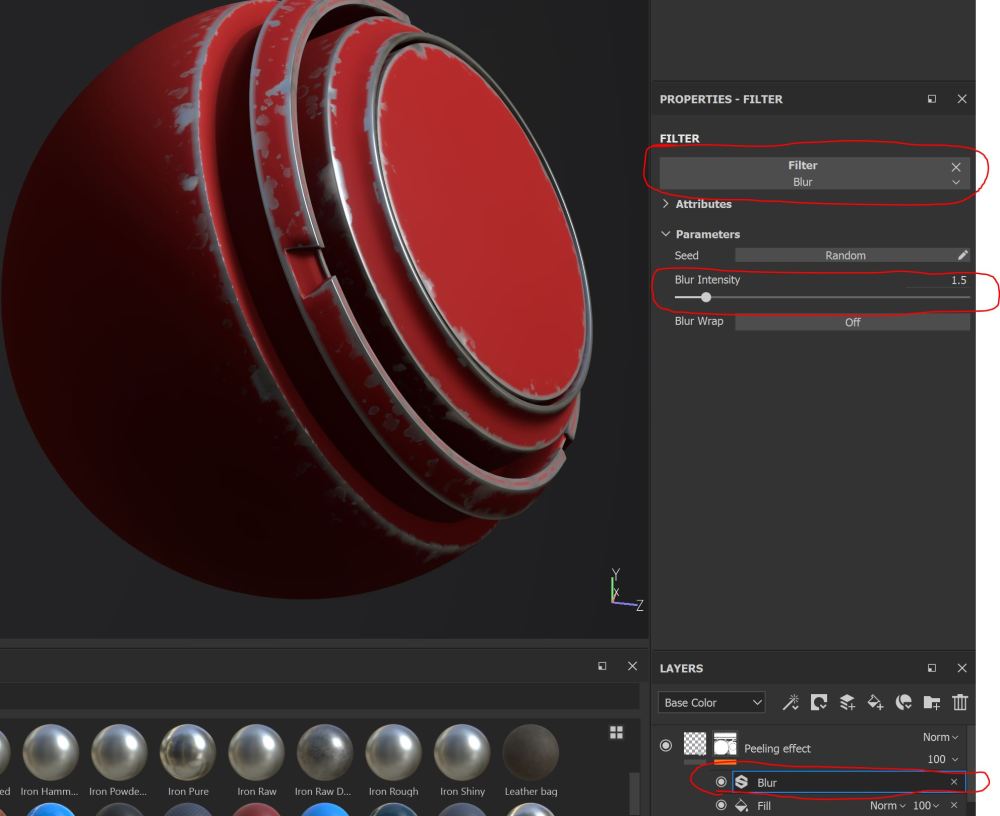
Second to last step, is to add levels. You can add blur in the same way you added the fill effect or the blur filter. We adjusted the level to this:

The values don’t have to be exact but as long as the arrows are in the general area as seen on the image you should get a result that looks something like this:
Final step is to add another fill effect on top of the levels. Load in the anchor point like the previous fill layer and set the blending mode of this fill effect to multiply.
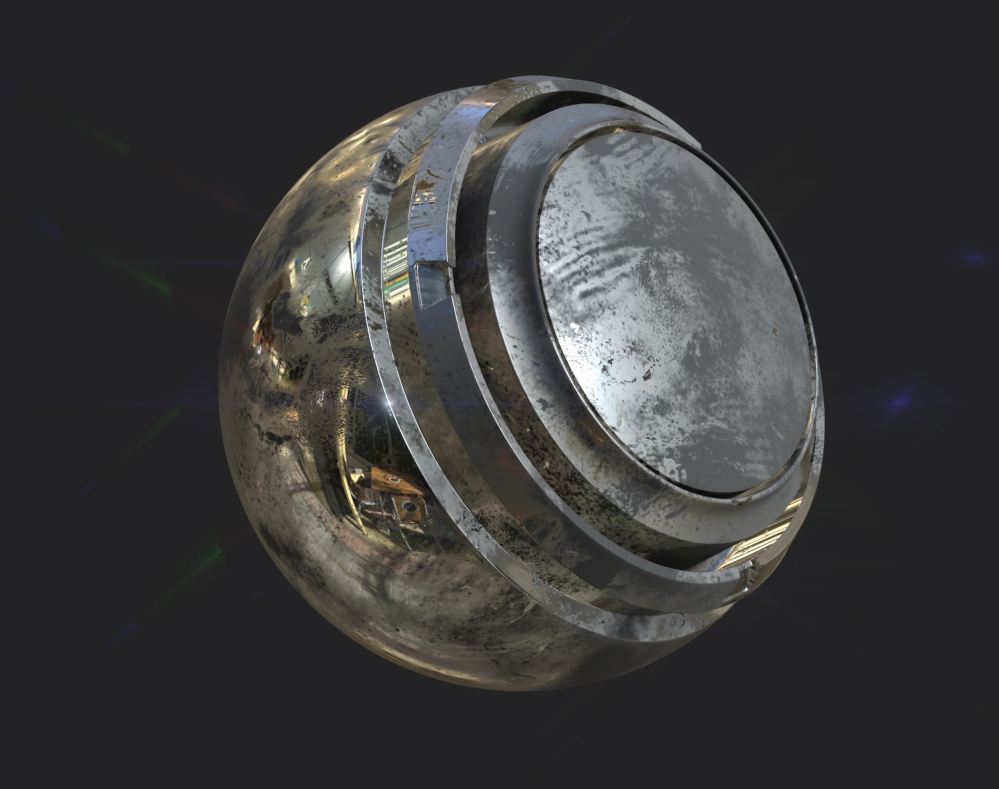
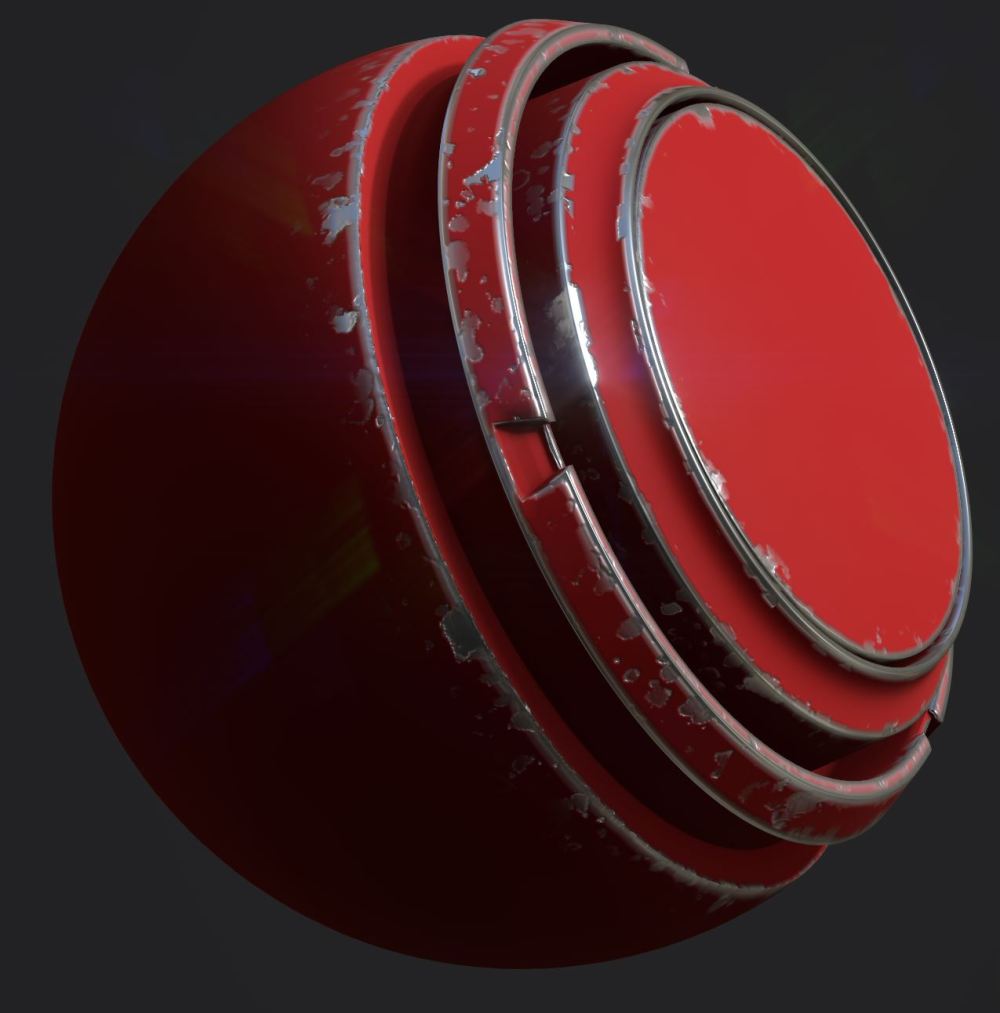
The final result should be this:
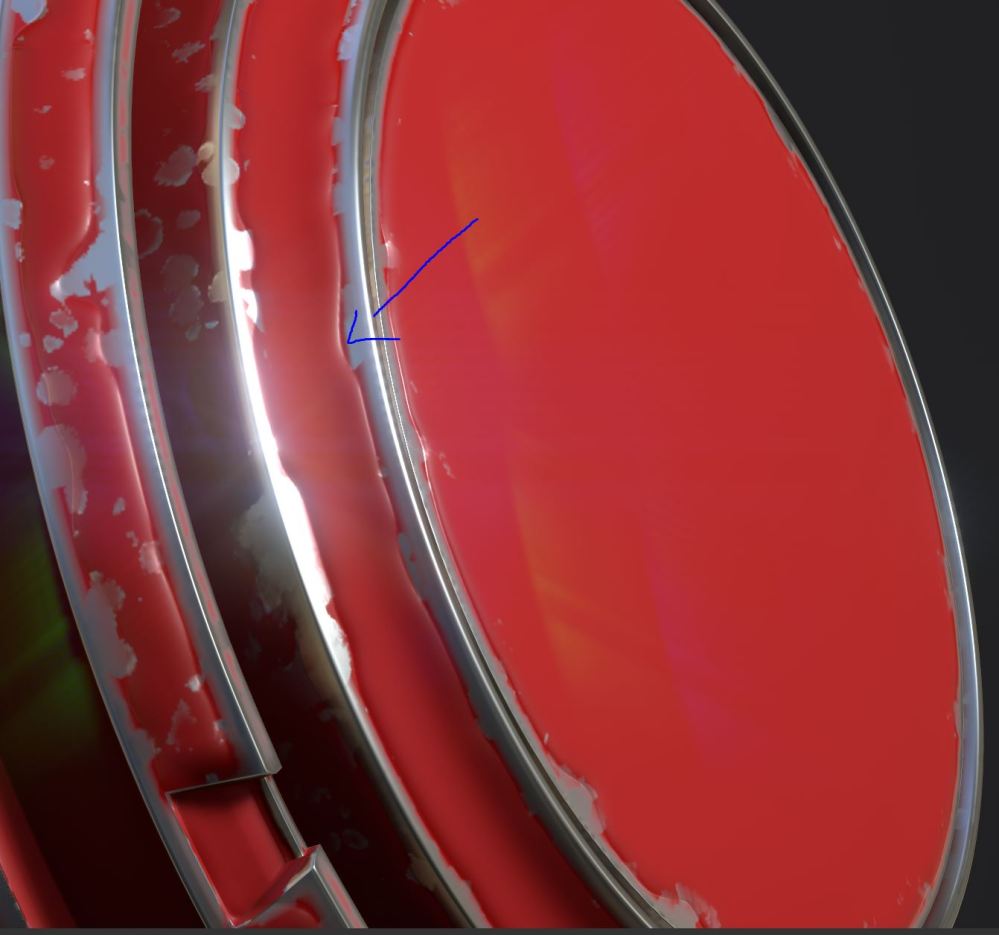
The image of my final result isn’t adjusted in anyway but if I wanted to I could adjust the height in last layer we did or spread out the grunge more. This was a really useful workshop which I can use if I ever make things like metal bridges since paint is used to protect the metal from moisture. I can even go even further with the realism and make the base metal layer appear rusty. I can see myself using this for any sci-fi projects or post apocalyptic environments since no one would have taken care of any man made objects so you’d see a lot of ware like this.
