Full Game
Inspirations
Story Inspiration
My game was inspired by many titles. Before I even visualized what the game is going to look like I needed to right the story. The story for my game was inspired by Movies like Deadpool and Jumanji. Deadpool made me want to make a self-aware game that directly speaks to the player and Jumanji became an inspiration because it was the most recent movie I’ve seen at the time. Jumanji was perfect as the humor in that movie was humor only gamers would understand. I wanted to make a game with humor that Games Designer students would understand. Also, the plot of my game is similar to Jumanji Welcome to the Jungle.
This is the type of humor I wanted for my game.
As for how I was going to tell the story of my game a game called ‘A Stanley Parable’ came in to mind. This is an indie game where a narrator is constantly narrating your life. I wanted the same for my game but instead of the narrator it’s ‘The Game Developer.’ The reason why I wanted this is because I want my target audience to be able to relate or have a connection with the game developer character. My target audience for this project is my class.
Visual Inspiration
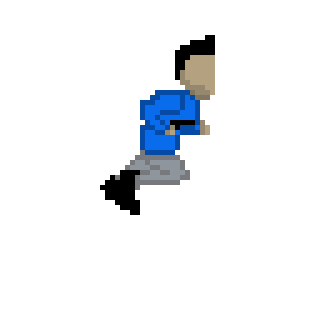
There were many games I took inspiration from when it came to it’s visuals. Super Mario Bros became my first inspiration but when I started drawing I slowly realized that I’m better at drawing with more pixels and more colour and before I knew it, my game became a 16 – bit style game. So then I started looking for games with more pixels which led me to Contra the biggest inspiration for my game.
My character design ended up looking quite similar to a Contra style character.
Gameplay Inspiration
Much like the visuals of my game I wanted the gameplay to be similar to Contra. Sidescroller shooter games were my favorite types of sidescroller games. This is the reason why I gave my enemy blueprints a projectile. It was originally going to be a an AI that upon begin overlap does damage to the player but since my character has a gun it would be more challenging if the enemy could shoot as well. Also because Contra has enemies coming in from different direction to add an extra layer of difficulty I made sure to add a flying enemy as well.


Research
Primary Research
The most I have researched for any project. I had a lot of primary and secondary research that helped me make the final product for this project. My primary research consists of me watching movies with similar story and humour Such as Deadpool, Jumanji and Space Jam. Watching movies were only useful when it came to righting my story Deadpool being the most impactful out of the three. I’ve also read a book called ‘The Art of Games’ which I mainly used to see how colors worked in 8 – bit to 16 -bit style game. If it weren’t for this book I probably would have kept my character bland with no shading.
I learnt how how to use shading from pages such as these:


You can see that they use darker colors for the outline of sprites rather than just going for a black outline which I ended up getting rid of.
I also played this game called ‘Binding of Isaac’ which I mainly used for ideas on level design. In that game I saw that there were a lot of thing that made each level pop out more. I noticed a lot of obstacles, moving sprites to make the map more aesthetically pleasing and also the game has a multitude of different projectiles. I wanted to add more projectiles in my game but because of time issues I wasn’t able to make anymore.
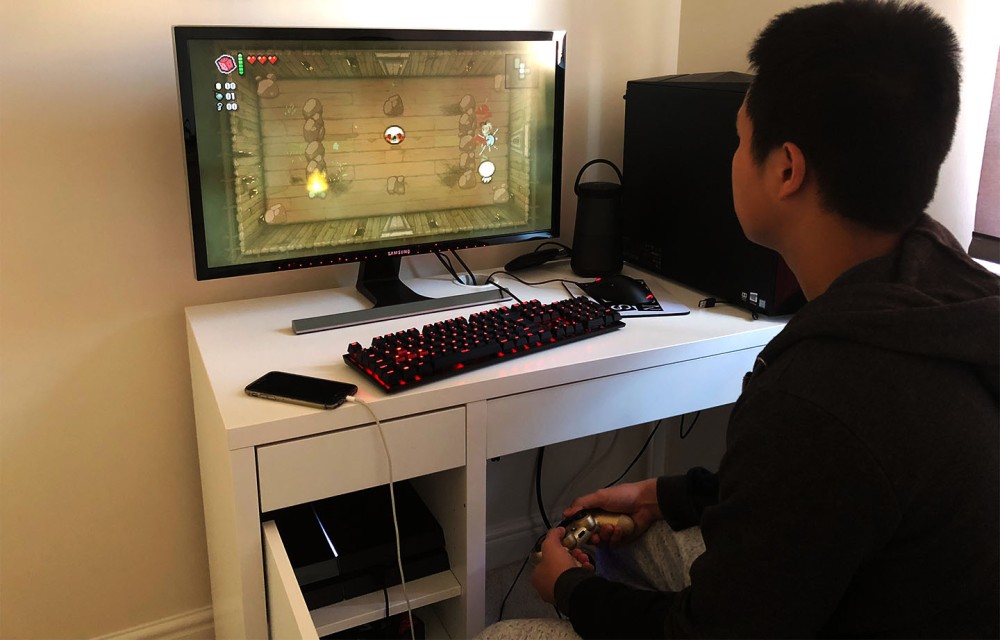
This is me playing the Binding of Isaac.
Secondary Research
Before this project I wasn’t really any good with Unreal and I always got confused when it came to things like making blueprints. But because I was actively researching different techniques on how to get around problems like collision boxes overlapping and moving projectiles I feel more confident when it comes to Unreal.
When researching how to make 2D sidescroller games the YouTuber known as WazzaTuts was the most helpful. His tutorial videos cover everything you need to know when making a 2D side scroller. After watching a few of his videos I already felt confident in Unreal Engine especially when it came to making blueprints.
This is the first video of a thirty – four part series. After watching a couple of his videos I already felt like I can confidently create blueprints on my own but whenever I got stuck on something I only needed to go back and look up some of his videos.
The next thing I needed to research was Mayan art. At the time of doing this research I didn’t have the luxury of going out and getting books on Mayan Art or go to a Museum to look at Mayan Art which is why I used the internet for this research.
I created a moodboard so that I can nit pick different parts of Mayan art to help me make the tiles for my Mayan Jungles level.

Personally I found Mayan Art difficult to recreate already but because I had to work in low resolution workspace I obviously needed to compensate for space and I needed to make my own interpretation of the art.
This is the video I made when making the Mayan tiles.
I am really satisfied with the way the tiles turned out as it was very challenging to make art with such a limited amount of space and with pixels.
Visual Evaluation
This is my first time ever making pixel art let alone a pixel game. With my limited experience I was at first intimidated by how surprisingly difficult it was to make pixel art. I found it difficult to make pixel art mainly because of I was so used to making 3D models in Maya. When making 3D models I didn’t have to manually add shading in to my textures as the software usually handles the lighting also, with Maya when making animations I either have to download the animation or work with keyframes. Keyframes are in my opinion a lot easier to work with when comparing it to flipbooks, it’s also a lot quicker.
Even though I found it more difficult to make sprites I feel really satisfied with how my game ended up looking.


Before my sprites looked like this I didn’t really use a lot of shading.


This is what my character looked like before I started shading. I used black outlines and my character was too bulky.
After I started drawing my enemy sprite I realise how much better looking that sprite was.

Much like the art I researched in the book ‘The Art of Games’ instead of using black outlines I use the same colour to draw the outline of the sprite only making it a darker shade. This technique ended up becoming used for all of my sprites and made it into my tiles as well.
After learning how to add shading I now feel more comfortable making pixel art.
Making the level itself was probably the easiest part of this project. Unreal Engine made it easy by using tile maps. With tile maps I can take sections of tilesets and add it into the tile map, you can even say which tile you want to have collision boxes making your job a lot easier. I will say that when it comes to level design I feel as though I can make a more visually impressive level it we’re a 3D project since it’s my specialty but considering the fact that this is my first time using tile maps I am happy with outcome.
Interactive Evaluation
The first bit of interactivity I wanted to add into my game was obviously the controls. After watching WazzaTuts’ tutorial I learnt how to use Enumerations which is basically a means for me to organise my animations making it easier for me to set the control for. for example upon the event ‘left mouseclick’ I was able to set the enum variable to play the shoot animation.
This is the video of me making adding in the animation and controls plus the video of me making the projectile spawn when I click the shoot button.
Obstacles
I wanted to make my game as challenging as possible. To do this I needed to add obstacles into my game. This was easy after learning how to make the death function and the damage system. My first obstacle was the spikes found in my tutorial level and final level and the second obstacle can be found in my island level and that is the falling coconut obstacle which I found easy to make after learning how to make a projectile spawn. I’m really glad with how these obstacles turned out as without them it would have made my game a bit bland. I never thought that I could make things like these before I started the project as before I would only focus on making assets and designing the level not actually make any blueprints.
Enemy
As I said before I wanted to make the enemy shoot to add a layer of difficulty and also an enemy that can fly to make the player look out from all directions much like in the game Contra. This was probably the most intimidating part of the project. But luckily Lee mad it easy. Usually when making an AI you would have to give senses, these senses are peripheral vision and hearing which was something I thought I needed to learn how to use in order to make my enemy shoot at the player but I was wrong because I’m working in a 2D environment the only sense the enemy needs is sight and I can make this by simply adding a collision box that upon overlapping with the character the enemy will spawn the projectile. Also, when making an AI usually what someone would do is set a Nav Mesh around the level which tells the AI where it can move but Lee showed me how to use the blueprint component ‘ interp to movement’ and vector points. This was a lot easier because all I wanted to do was make the crab patrol from side to side like in all side scroller games and by using vector points I was able to set the location of where the enemy needed to go and then tell it to come back to it’s starting position and it would just loop.
My favourite bit of interaction is the player’s interaction with the moving platform at the end of my island level where upon begin overlap the platform would start to move to end of the level. This is probably the tenses part of my game as not only will you have to dodge coconuts but you also have to keep up with the moving platform as it will not come back for you.
The last bit of interaction is in the story telling. I voiced the ‘Game Dev’ character in my game and the character would interact with the player breaking the fourth wall. I wasn’t the best actor so I can’t really say this was my favourite player interaction.
Audio Evaluation
I didn’t really focus much on the audio. I only added about two sfx and and did some voice acting.
I had planned to add a soundtrack to the game but because I am musically illiterate I decided to not focus on it at all given the fact that I also have a limited amount of time to finish the game.
In terms of how I got on with making audio, I can’t really say I’m satisfied or dissatisfied as my project didn’t revolve around audio even though voice acting was such an important part in telling the story. I only wanted to do voice acting to try something new. I never really had time to research how to use Adobe Audition which probably explains the poor audio quality on the voice acting.
This was my least favourite part of the project through the fault of my own as I should have divided up my time more wisely even before my game got corrupted. I should have known that this was my weakest point and I should have improved on it.
Problem Solving
Most of my problem solving can be found in my ‘Creating the game’ blog. Most of the problems that I had to solve were easy fixes. Usually my problems were caused by me not setting the target for the blueprints which causes an error message.
Whenever do have a problem I don’t know how to solve I would look up either WazzaTuts’ videos or someone else’s tutorial videos to help me find the answer. If I couldn’t find the answer, a good example of this would be when I was making the enemy crabs. I couldn’t find the answer on YouTube so I asked my tutor Lee for helped and he simplified the solution. When I was having creative problems I would ask my peers how to improve or I would look up similar art styles for inspiration. An example of this was when I was making my character. I asked some of my friends how I could improve and my friend Jack who specializes in pixel art told me to add shading and after looking at other artists’ work I couldn’t have agreed more. Learning how to add shading cause me to evolve my character twice.
Overall there wasn’t really any problem I had major issues with. I did have a problem with my level transition which I will talk about in greater detail on the ‘what went wrong‘ section.
What went well
- The game ended up being what I envisioned from the start. There were bits of the game that was cut out but the core idea ended up making it into the game which is to make it self-aware and not to be taken seriously.
- I did originally want this game to be 8 – bit but in my opinion the would have looked worse if it was 8 – bit so I ended up making it 16 – bit.
- I got my friends involved with the voice acting. This made the project an overall fun experience.
- I completed my original aims and objectives from my Idea and research blog.
- My character design has improved overtime and effected the overall aesthetics of the game.
What went wrong
The only thing that really went wrong with my project was that time my game got corrupt. I realized this after making my level transition. What would happen was whenever I enter the portal to open the next level instead of taking to the next level it would just take from next level to current level. If there was an issue with the blueprint Unreal would have told me but it didn’t meaning the files must have gotten corrupt somehow and the only way to fix it was to start a new project.
How it affected the final product
This was really bad for my project as I needed to change my schedule to make time for the progress I have lost.
This was my schedule before the I started a new project-

And this is the schedule after-
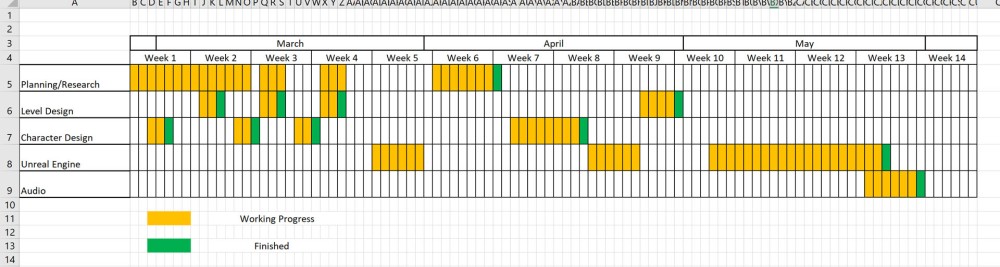
As you can see I needed to cut time for audio but also you can’t really tell from the graph but I also had to cut the final level for my game. I was originally going to have my final level completely 3D and include my tutor but since I needed to recreate my other levels I just didn’t have enough time. Since I didn’t have a lot of time to work on my audio, the audio quality ended up being poor.
The main issue I had with this project was timing. Perhaps the reason for this was the fact that I was over ambitious with the story and gameplay giving myself a heavy schedule.
How to improve
- Next project I will know what my limits are and I will try to make a game that is not over ambitious.
- My game isn’t fully complete. To improve my game I could add respawn for the player character because right now when the player dies the game just closes itself.
- I could add a basic options menu that could change the resolution of the game.
- I could add more sound effects for things like the jump animation and the running animation.
- I could ask people with musical experience to help make the soundtrack for my game.
Experience and how to use in the future
In this project I learnt how to make Pixel Art. It was a difficult process at first since I was used to modelling in 3D but now I’m more comfortable making sprites. I can use this in the future if I ever want to go back to making a 2D game.
The thing I enjoyed most about this project was learning how to make blueprints. With my previous projects I had a vague idea on how they work and was never really confident in making them, but now I have started learning new techniques I can now say that I am more confident with Unreal Engine and I can use this experience in the future if I ever develop a game.
My Photoshopping skills have improved over time. You can see my skill with Photoshop when I made the loading screen for my game. This is a skill that’ll be using a lot not just with college but also as a hobby as well. This will be useful one day if I ever make Main Menu designs, loading screens or even game icons.
This project was an overall fun and worthwhile experience. I got to learn so many new things especially in the coding side of the project. All of the things I’ve learnt will be used in my future projects. Next time I will challenge myself and make a 3D game.
