For this work shop we learnt how to make and how to use ID maps on substance painter. ID maps shows areas of the UV map that belong to different materials. This is a necessary skill to have in the industry as it allows game artists to texture really complex models with only one texture set, which makes organisation easier.
Making the ID map
First thing we did was download a pre-made shield model with an unfolded UV. This UV was then exported into photoshop as PNG image and we coloured in areas of the UV that contain different materials, each with it’s own unique colour.
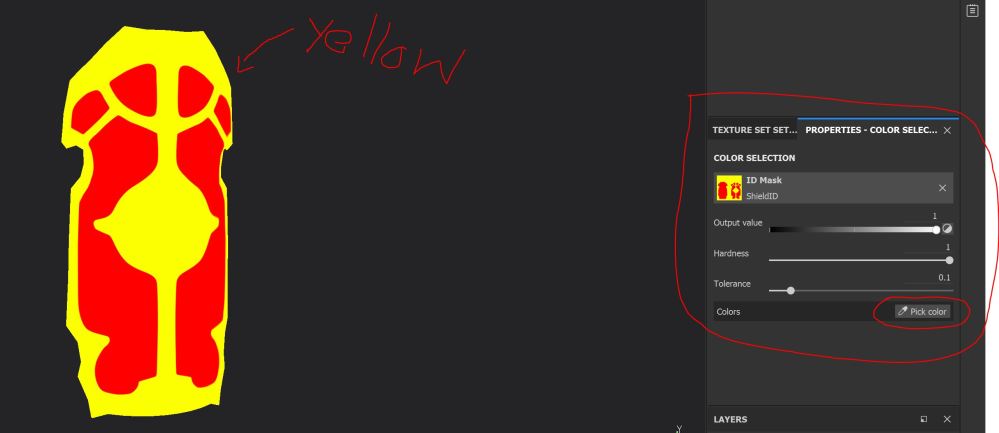
This is what the shield ID map looks like. The yellow area will be made out of a gold material and the red will be wooden.
We did this by tracing out the concept art for the shield (this came with the shield download) using the pen tool and filling it with the colours.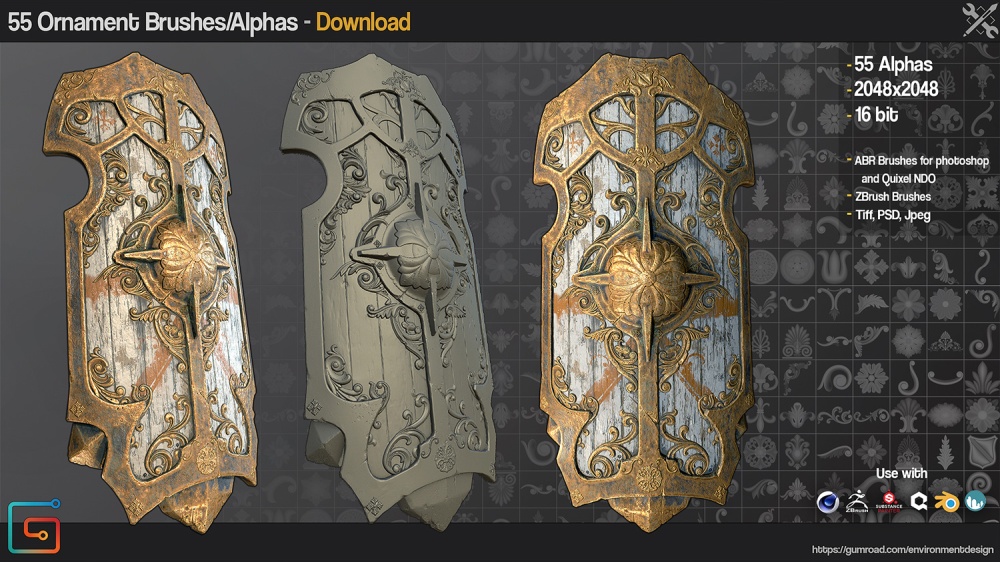
This was a time consuming way of making an ID map but, the reason why did it on photoshop is because we did not have the high poly version of the shield to bake in so we needed to trace out the details.
If it were up to me, I would have made a low poly shield and a high poly shield and instead of manually drawing the ID map, I would just apply a different colour lambert material on the high poly model and bake that in. It is a simpler way of producing an ID and it saves time.
Importing the ID map
Learning how to make the ID map is only half the journey. We needed to learn how to use them as well.
Firstly, we imported in our shield to substance painter and made sure to make it 4K. This is what the shield initially looked like:

As you can see it’s just a simple model, but by using ID maps we’ll be able to add textures exclusive to an area with a different colour.
To import our ID we first needed to bake our mesh. This is done in the “texture set settings” and clicking the button “Bake Mesh Maps“. This will bring up this menu:
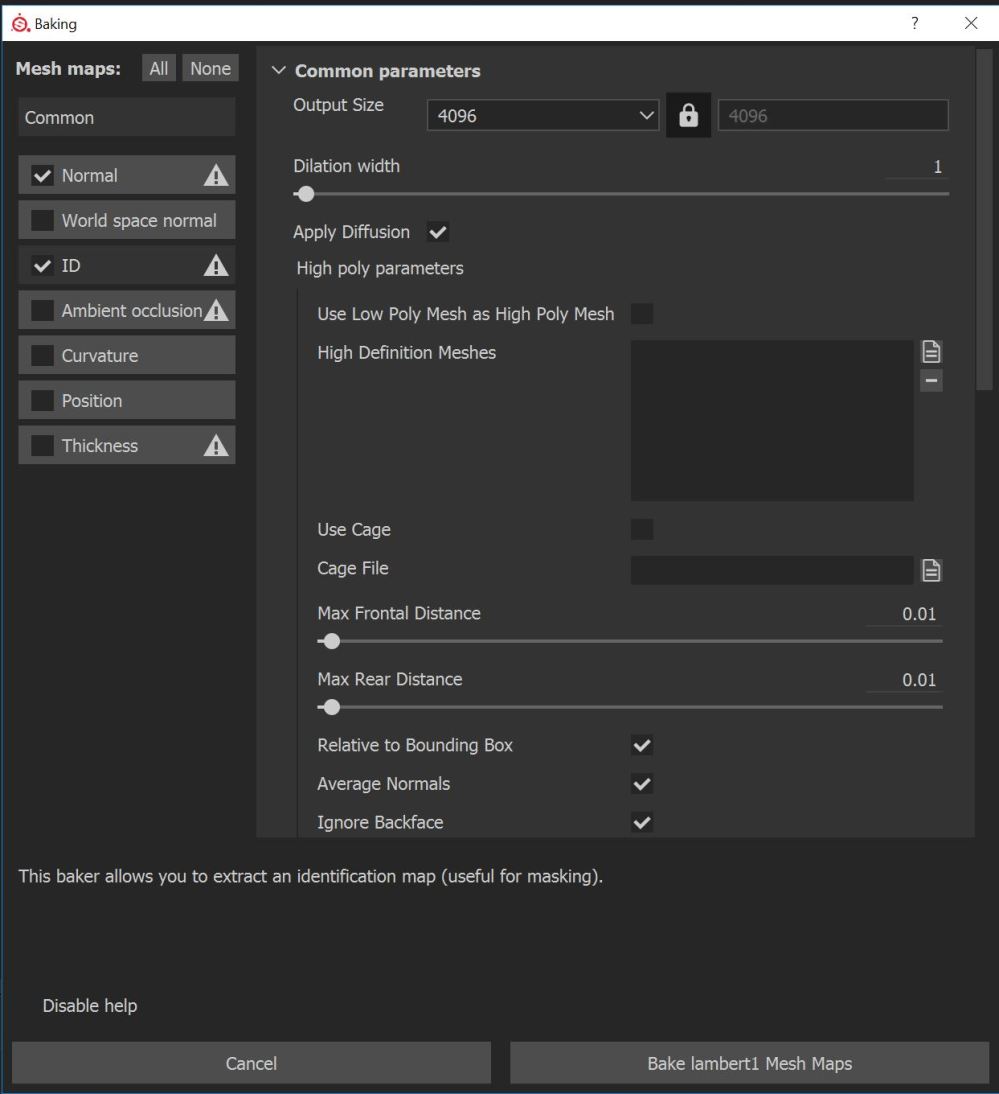
For this project we needed to make sure the ID map was ticked as well as making the output size 4096. Once we clicked Bake lambet1 Mesh Maps, we noticed that “select id map” have been added in the texture set settings.


Now that the ID map has baked, the next thing we need is the ID map itself. To import an ID map click “import resources“ on the shelf bringing up this menu:
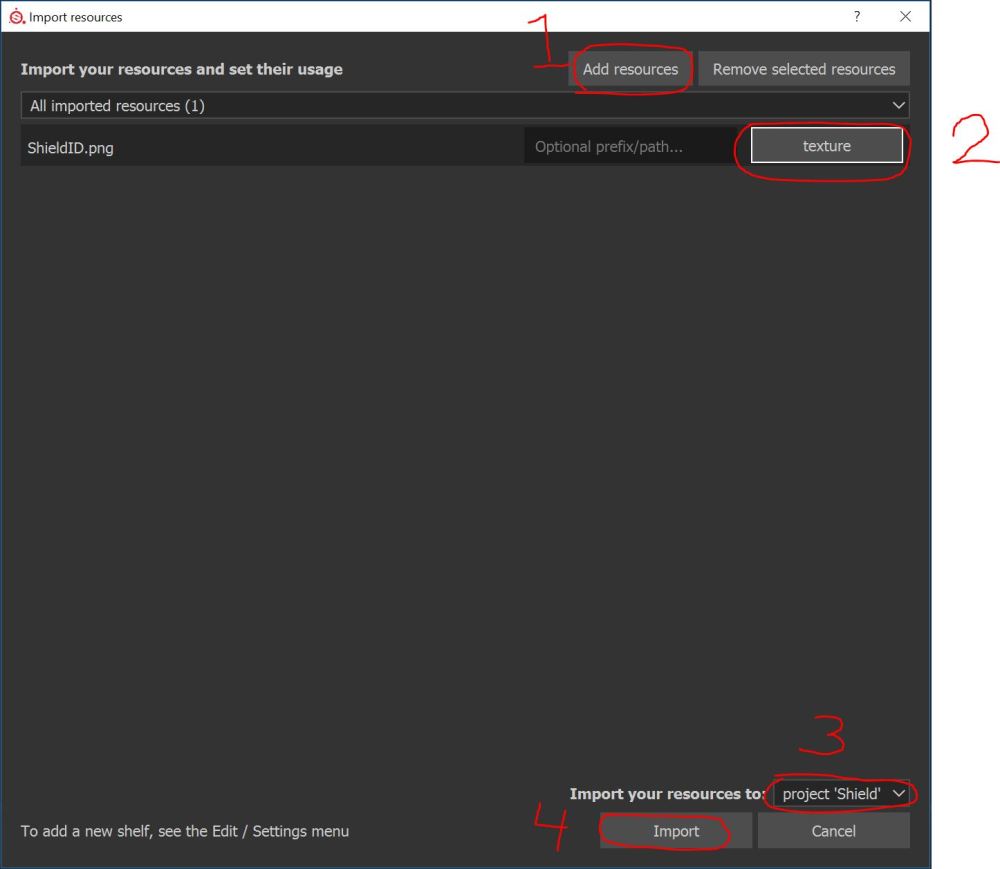
We first clicked on “Add resource” and selected the ID map. Substance will then need to know which path should the ID be placed into. We want to put this in the “texture” path. Thirdly, we needed to tell substance whether we want to import the this to “current session“, “ project’_’” or “shelf“. Importing into current session will make it so that the next time you open substance painter, the texture will not be seen on the shelf. Importing to project’_’ will save your texture for this particular project only and importing to shelf will allow you to use the texture for any project.
Now that the ID map has been imported in, we simply just needed to drag and drop the image to ‘select id map‘ in the texture set settings.
Utilising the ID map
This is the part where we start texturing the shield.
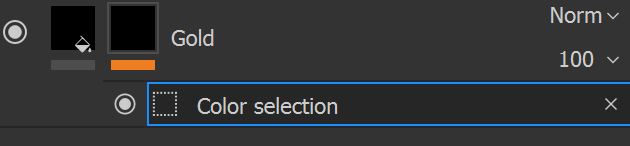
Like with most projects, I started by applying a fill layer and coloured it gold. The problem with doing this however, is that it would cover the whole shield with gold since it only has one texture set.

This is where the ID map comes in. We first added a black mask to the gold fill layer adn right clicked it to add a “color selection“.
You should see a “properties – color selection” menu pop up on the right hand side of the screen. On that menu we clicked on the “pick color” button which has an eyedrop icon next to it. The shield changed colour to the ID map colours and all we needed to do was select the colour that was associated with the gold material.
This is what I ended up with:

I did the same process with the wood texture of the shield. This texture was downloaded from textures.com and came with height maps, ambient occlusions, roughness and metalness maps.
Next step was to add detail. We wanted to have ornamental patterns on the shield. My tutor was kind enough to have bought and downloaded ornament alphas that we could use to paint our shield with.

We did this by adding a normal layer and on “properties – paint” we selected the ornaments that my tutor downloaded for the alpha shapes. We then turned the height channel all the way up to and painted.

It’s worth noting that when painting in substance painter, there is an option to add a line of symmetry to your mesh so that you keep the patterns that you paint symmetrical from one another.
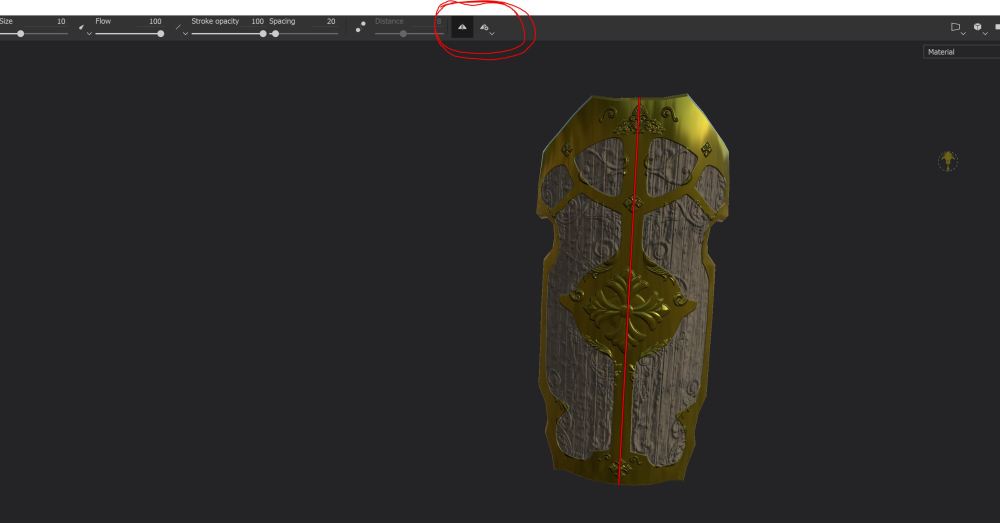
You can simply change the axis in which the line of symmetry is positioned by going on the symmetry settings next to the symmetry button located on the top of the UI.
Conclusion
This is was a very useful tutorial for me. Had it not been for this tutorial I would have made assets with multiple texture sets which really make it difficult to organise textures and would probably use up space in my memory. Now that I know the basics of ID maps I can now make assets with only a single texture set. I will make sure to use ID’s for my upcoming competition against my class since one of the criteria is in order to be eligible to compete is to only have one texture set.
